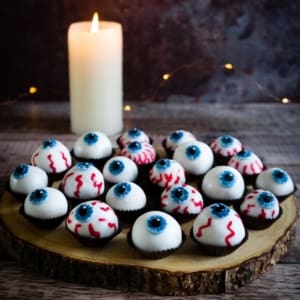
Gooey Chocolate Eyeballs with a Raspberry Jam Centre (No Bake)
No bake gooey chocolate eyeballs with a pop of raspberry jam in the middle. Horrifyingly decorated and too tasty to resist!
Print
Pin
Email
Serves: 40 eyeballs
Calories: 139kcal
Ingredients
For the balls:
- 300 g medjool dates (*see note)
- 200 g almond butter
- 50 g cacao powder (substitute: cocoa powder)
- 40 g coconut nectar (substitute: maple syrup)
- 25 g coconut oil (melted)
- 100 g oat flour
- ½ tsp salt
- 1 dash water (to blend)
For the centre:
- 100 g raspberry jam
For the decoration (the fun bit!):**
- 500 g ready to roll white icing
- 50 g ready to roll blue icing
- 20 g ready to roll black icing
- Edible glue
- Edible paint - white and red
- Edible ink pens - dark blue and glitter blue (felt tip style)
Instructions
To make the balls:
- Blitz all of the ball ingredients in a food processor with a dash of water until smooth and fully combined. Use small dashes of water to keep the mix moving but you shouldn’t need too much. You want the consistency to be dry enough to roll into balls without it sticking to your hands.300 g medjool dates, 200 g almond butter, 50 g cacao powder, 40 g coconut nectar, 25 g coconut oil, 100 g oat flour, 1/2 tsp salt, 1 dash water
- Take a small amount of the mixture, roll it into a ball and then press your little finger into it to form a bowl shape.
- Add a small amount of jam to the centre of the 'bowl' and then take another bit of the ball mix, flatten it out and place it over the top of the 'bowl' to encase the jam. Roll the mix gently in your palm to make a spherical shape. (Please see the recipe video for a demonstration).100 g raspberry jam
- Once you’ve made your balls, place them in the freezer for at least an hour to harden up. You won’t need to keep them frozen, this just makes them easier to decorate and keeps them in a spherical shape whilst you ice them.
To decorate your eyeballs:
- Whilst your balls are in the freezer, make your irises. Dust a smooth surface with a little icing sugar and roll out your blue icing to around 1/8-1/4cm (1/8") thick. Cut out small circles.50 g ready to roll blue icing
- Repeat this process for the pupils using the black icing and cutting out smaller circles. I used two different sizes of metal straw and it worked perfectly. You could also use the two ends of a metal piping nozzle. (Please see the recipe video for a demonstration).20 g ready to roll black icing
- Glue the pupil to the centre of the iris with your edible glue and set it aside to dry.
- Dust your surface with a little more icing sugar if needed and then roll out your white icing to around 1/4cm (1/8") thick.500 g ready to roll white icing
- Take 5 of your balls out of the freezer at a time, leaving the rest in the freezer. Cut out a white circle of icing large enough to cover your eyeballs. If you’ve cut it a little small you can roll out the circle a bit more with your rolling pin to expand it, it doesn’t need to be a perfect circle.
- Wrap the white icing around the ball, patching any gaps with additional icing. Roll the ball between your hands until it is smooth and then pop it in a petit four case. At this point you can set it aside at room temperature, you were only keeping it frozen to aid the covering process.
- You may notice that the icing goes glossy as the balls defrost but don’t worry about this, I found it actually aids the painting process and they will dry out again within an hour or so.
- Once you’ve covered your five balls with white icing, glue the iris to the eyeball using edible glue.
- Decorate the iris with your blue pens and then add a dot of white paint to the top corner of the pupil. Paint red veins on the white of the eye if desired. Go easy on the thickness of the paint as it can take a while to dry out - make it as thin as possible.
- Repeat with the rest of your eye balls, 5 at a time. Leave over night at room temperature to dry out.
Video
Notes
Vegan / Dairy Free / Egg Free
* If you don’t have medjool dates you can use regular dates, just soak them in hot water for an hour and drain them before use.
** Be sure to check that all of your cake decorating materials are vegan as some can contain non-vegan ingredients.
Recipe inspired by: UK
Please check the allergens on the ingredients you purchase before use. The allergen information provided in this recipe is intended as a guide only and is based on the specific ingredients and brands used at the time of creating the recipe, therefore we cannot guarantee that the same will apply to the ingredients you use. Nutritional values are estimated.
We highly recommend you use the metric and 1x options on this recipe card for the best results. Please note that this recipe has not been tested using US measurements or increasing ingredient quantities to 2x or 3x, therefore results may vary.
Nutrition
Calories: 139kcal | Carbohydrates: 24g | Protein: 2g | Fat: 5g | Saturated Fat: 1g | Sodium: 33mg | Fiber: 2g | Sugar: 19g | Net Carbohydrates: 22g
Have you tried this recipe?Tag @aveganvisit on Instagram or hashtag it #aveganvisit!