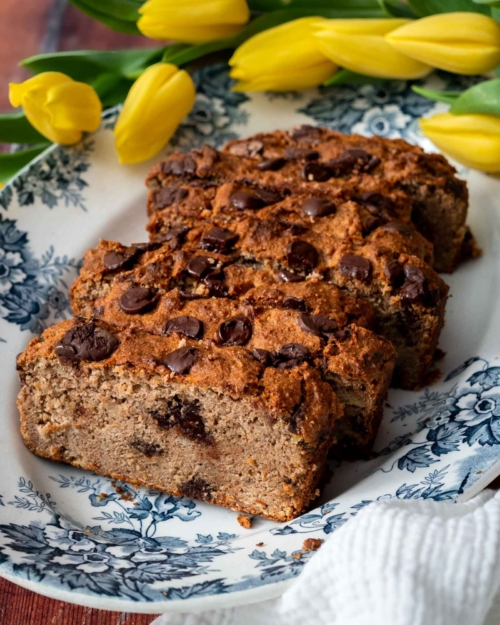
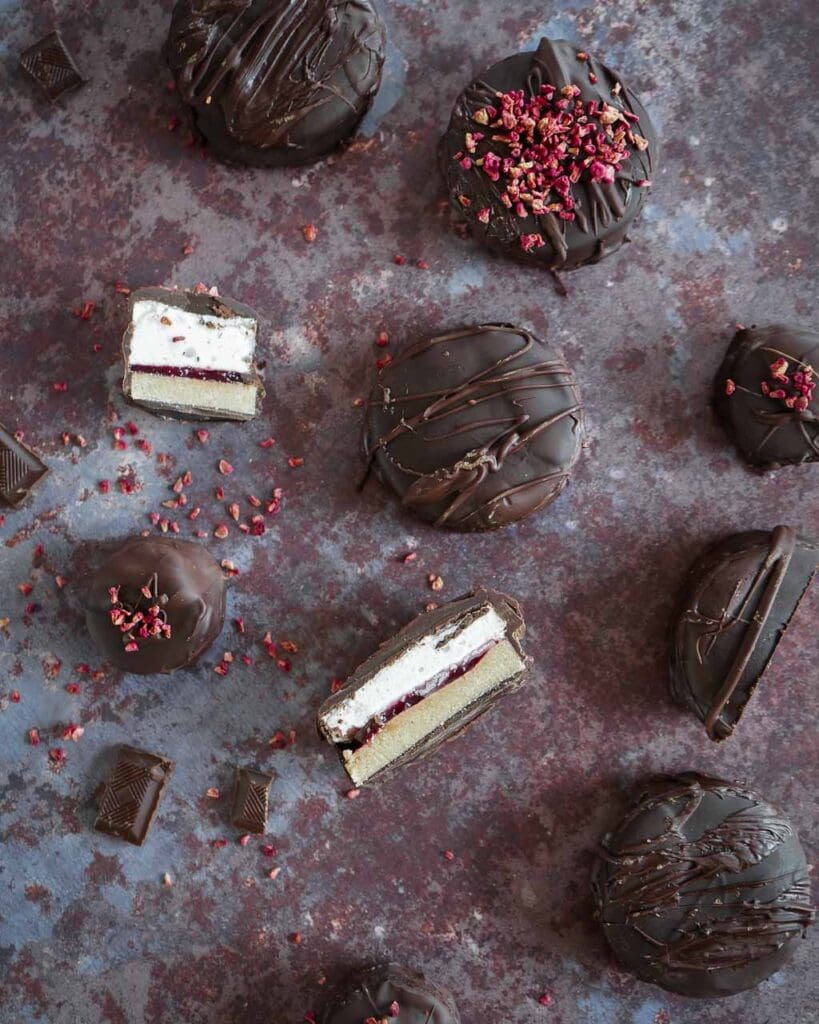
Epic Vegan Wagon Wheels with a layer of fluffy vegan marshmallow, tangy raspberry jam and sweet oat biscuit coated in dark chocolate.
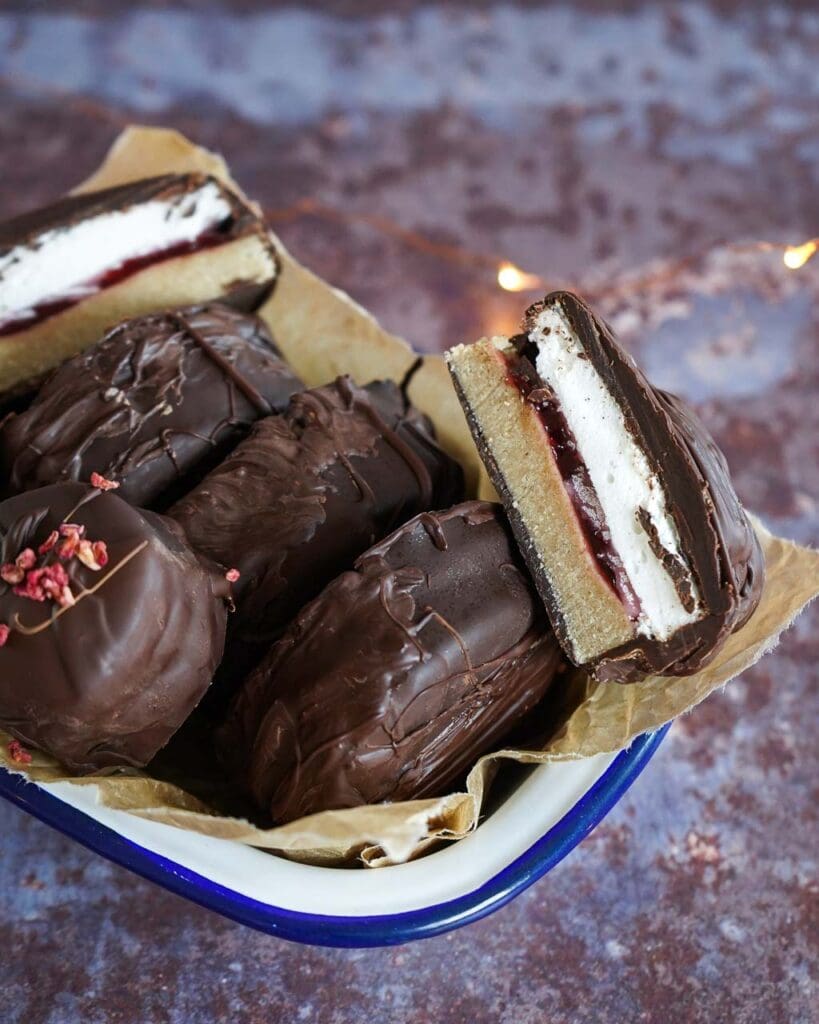
Nutie Donuts in Sydney provided the inspiration for these bad boys. Why should us vegans miss out on the perfection that is the wagon wheel just because vegan marshmallow is like the food version of a diamond encrusted unicorn?
Fear not, my friends. After (many) attempts, I have perfected the art of the homemade vegan marshmallow and thus, it is my pleasure to present to you my Vegan Wagon Wheels. Complete with fluffy, silky smooth marshmallow, tangy raspberry jam and a sweet biscuit base.
Now, before you say it, I know that regular wagon wheels have biscuit at the top and bottom but these are special so we’re going straight from chocolate into marshmallow like the rebels we are.
Bring your cooking A Game and lets get started.
I have no doubt that you will LOVE this recipe – be sure to tag me on Instagram when you make it @aveganvisit 🙂
The Video Recipe :
The Written Recipe :

Vegan Wagon Wheels
Ingredients
For the marshmallow:
- 100 ml aquafaba (the water from a tin of chickpeas, at room temperature)
- ½ tsp cream of tartar
- 1 tbsp vanilla paste
- 130 ml cold water
- 1 tsp agar powder
- 300 g caster sugar
- 30 g icing sugar
- 30 g cornflour
- spray oil
For the biscuit:
- 500 g oat flour (gluten free if required)
- 125 g coconut oil (melted)
- 250 g maple syrup
Other ingredients:
- 1 kg vegan dark chocolate (gluten free if required)
- 200 g raspberry jam
Optional:
- 10 tsp freeze dried raspberry pieces
Equipment
- Sugar Thermometer
- Cookie Cutters (4cm and 6cm)
- Silicone Pastry Brush
- Stand Mixer
Instructions
To make the marshmallow layer:
- Add the aquafaba and cream of tartar to your mixer, attach the balloon whisk and set on high speed to beat until the aquafaba is at the 'firm peaks' stage.100 ml aquafaba, 1/2 tsp cream of tartar
- Note: 'Firm peaks' is where the mixture is pure white and will stand up in a peak shape when the whisk is lifted out, without collapsing – please see the recipe video for an example.
- Mixers vary in the time it takes to whisk the aquafaba to firm peaks – it could be anywhere from 15 to 45 minutes.
- Whilst the aquafaba is whisking, make the biscuit layer (see instruction below).
- Once the aquafaba is at the point of firm peaks keep the mixer on a medium speed and add the vanilla. Don’t be tempted to add it sooner than the point of firm peaks.1 tbsp vanilla paste
- Set the mixer back to high and whisk for a further 10 minutes. At this point the aquafaba should be very firm.
- In a saucepan, add the cold water and agar powder. Bring to the boil and simmer for 2 minutes whilst stirring constantly.130 ml cold water, 1 tsp agar powder
- Add the caster sugar, bring back to the boil and simmer, stirring constantly, until the liquid reaches 115°C (240°F).300 g caster sugar
- Note: If you don’t stir the liquid when you are using agar it will start to set and therefore won’t set your marshmallow properly.
- Turn the mixer on to it’s lowest setting and drizzle the hot sugar and agar mixture in VERY slowly (and carefully). If you don’t do it at a snail’s pace it could cause your aquafaba to flop.
- Note: If you hadn’t noticed from the recipe, vegan marshmallow can be a touchy little blighter! The recipe should work without any problem as long as you follow it exactly.
- Once the sugar and agar mixture is fully in the mixer, turn it back up to high and mix for another 10 minutes. At this point it should be beautifully glossy and white.
- Mix the icing sugar and cornflour in a bowl. Spray a little oil onto the marshmallow dish of choice, line it with parchment paper, spray it again with a little more oil and then dust it with the cornflour and icing sugar mixture. This stops the marshmallow from sticking.30 g icing sugar, 30 g cornflour, spray oil
- Note: I used a 27cm x 20cm x 3cm (10" x 8" x 1") brownie tin for my marshmallow and then cut the marshmallows in half depth ways once they were set. It’s easier to do this than to try and spread your marshmallow fluff really thinly when you are transferring it to the tray from the mixer.
- Pour the glossy, voluptuous marshmallow mixture into the prepared tray and then set it aside, in a cool room (not the fridge) to set overnight.
- Keep the remaining cornflour/icing sugar mixture as you’ll need this tomorrow.
To make the biscuit layer:
- Add the biscuit ingredients into a bowl and mix together until combined.500 g oat flour, 125 g coconut oil, 250 g maple syrup
- Line a dish with parchment paper and then press the mixture in firmly to make a thin layer (around 5mm thick).
- Pop in the fridge to set for 1 hour or overnight.
Compile the wheels:
- Transfer the biscuit layer onto a chopping board and use your cookie cutters to cut out rounds of biscuit. 4cm (1.5") works great for a mini wagon wheel.
- Dust a clean chopping board with the cornflour/icing sugar mixture and then gently transfer the marshmallow onto the board.
- Cut out the marshmallow using the same sized cookie cutters as your biscuits. If they’re a little thick you might like to cut them in half (depth ways) so they’re 5mm – 1cm (1/4" – 1/2") thick.
- Dust the marshmallow rounds generously all over with the remaining cornflour/icing sugar mixture and set them aside.
- Melt the chocolate in a microwaveable bowl. It should take around 2 minutes but check it in stages and give it a stir as necessary until it is fully melted.1 kg vegan dark chocolate
- Set up a decorating station. I’d recommend a large oven tray with a cooling rack standing in it with paper underneath to catch some of the melted chocolate (see the video for an example).
- Dip one side of the biscuits in the chocolate and set them down on a cooling rack, chocolate side up. Put in the fridge for 30 minutes until the chocolate has set.
- Once the chocolate has set, turn the biscuits upside down so that the chocolate is facing downwards. Smooth on a thin layer of raspberry jam and top with a marshmallow round.200 g raspberry jam
- At this point, if the chocolate is cool but still easily pourable then it is perfect to use. If it has set a little, then melt it again in the microwave for a few seconds but leave it to cool until it is no longer warm to the touch before using it. If you use it whilst it is hot it’ll melt the marshmallows.
- When the chocolate is at an appropriately cool temperature, pour it over your wagon wheels and smooth it around the edges to make sure they are completely covered. If you’ve got a silicone pastry brush, it’ll come in very handy here to fill in any gaps!
- You might like to add a sprinkling of freeze dried raspberries to the top of some of your wheels.10 tsp freeze dried raspberry pieces
- Pop them in the fridge to set (around 30 minutes) and then enjoy all of you hard work. They are a thing of wonder!
Video
Notes
Nutrition
Tara
Hi, I’m Tara. I share comforting vegan recipes with a healthy twist – nourishing, approachable and designed for real life. I’m so pleased you’re here!