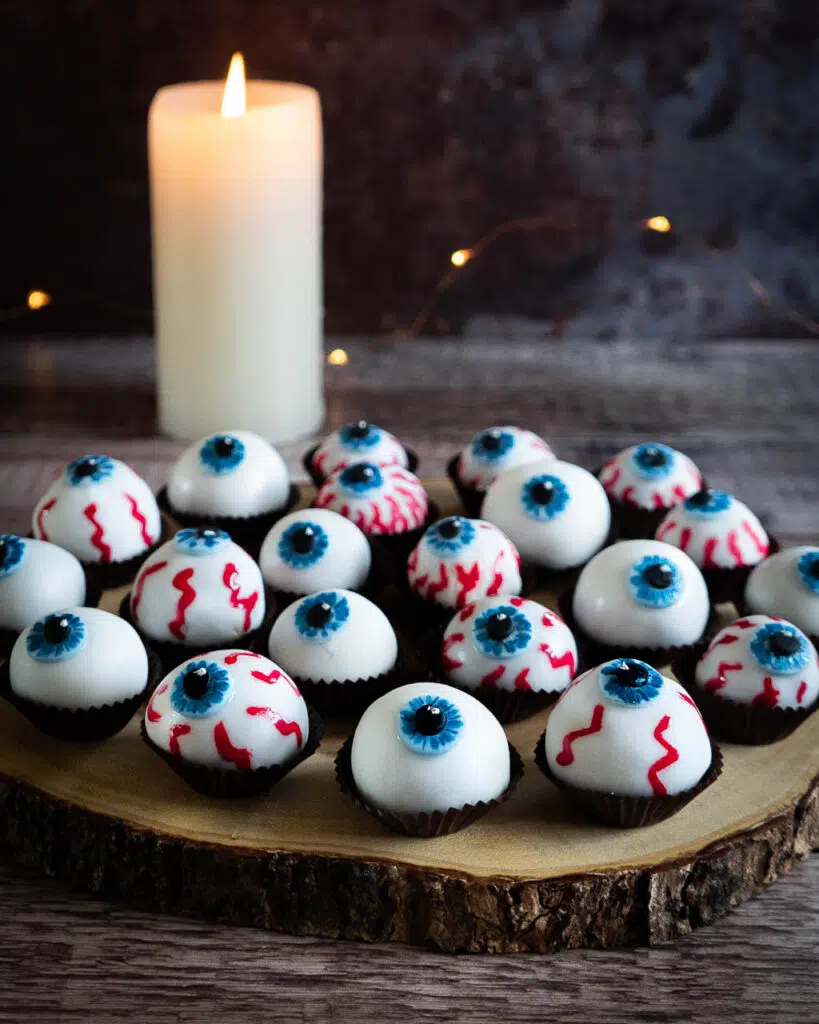
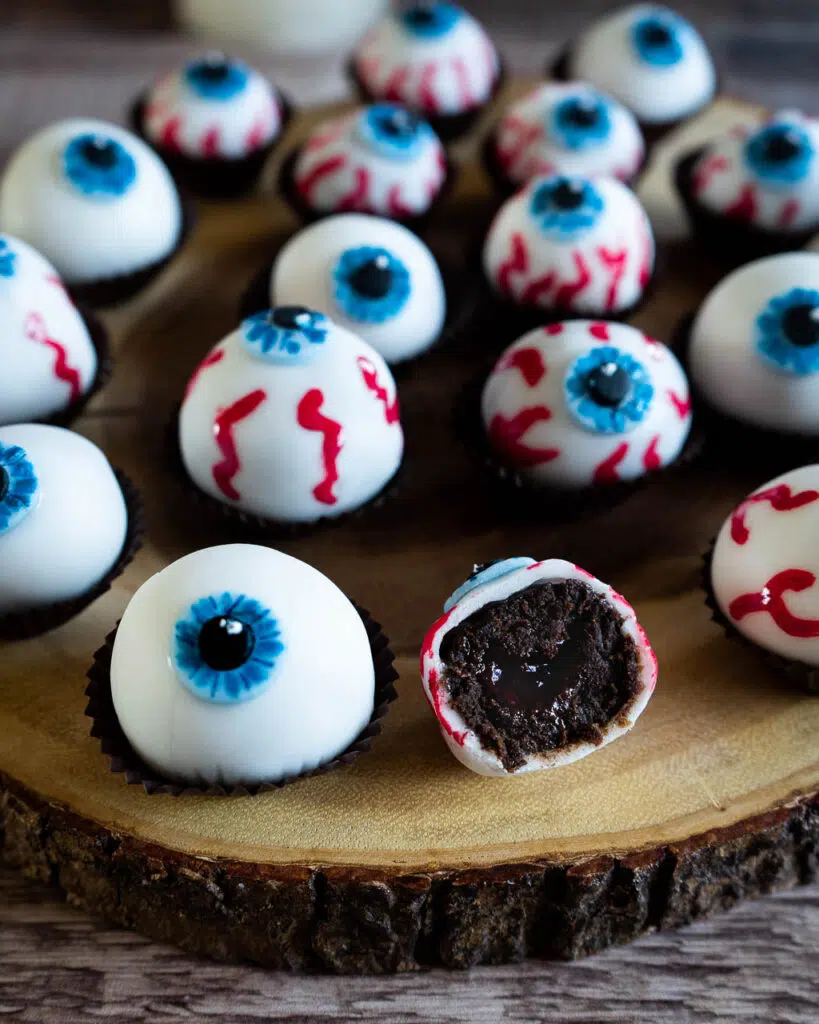
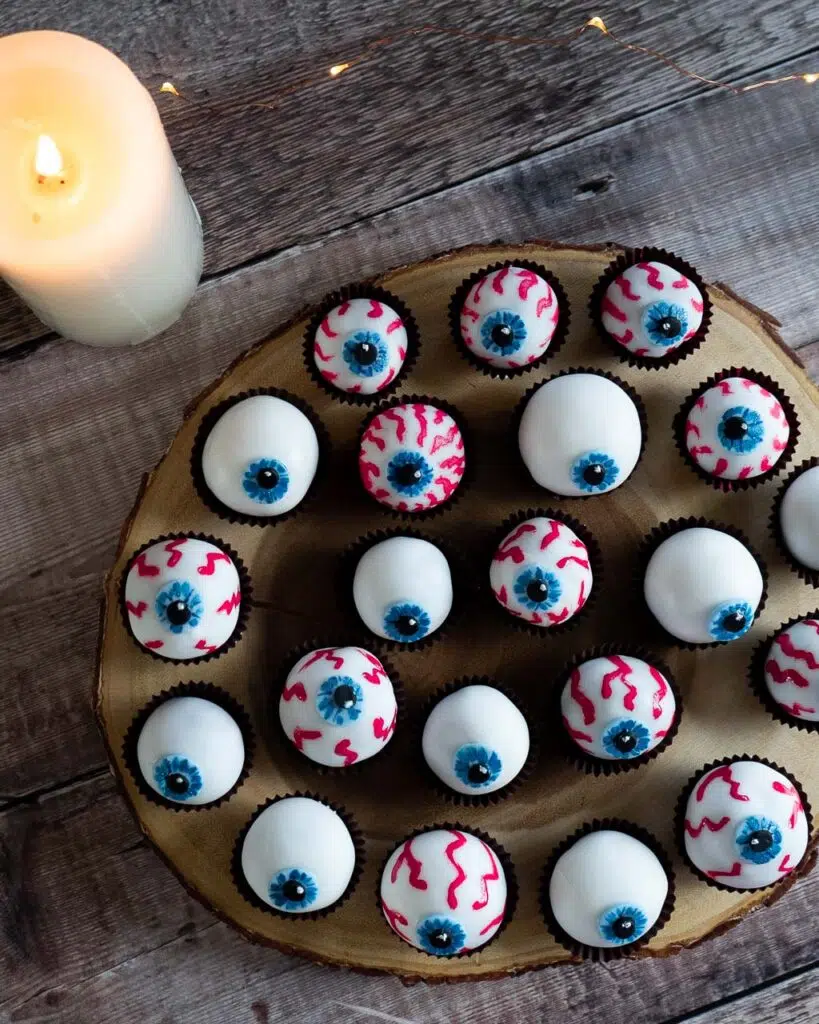
No bake gooey chocolate eyeballs with a pop of raspberry jam in the middle. These vegan halloween treats are horrifyingly decorated and too tasty to resist!
Well these were a rather glorious creation. Who knew making and decorating gruesome eyeball-shaped snacks could be so therapeutic?
These little gems came about after an invite to a friend’s Halloween party in those blissful pre-COVID days. I hadn’t been asked to bring along spine-tingling treats but inspiration often comes out of nowhere. The original plan had been for one big eyeball that oozed a suspicious looking (yet tasty) liquid from it’s centre and had sticky, jam covered nerves attached the back of it but after a number of cake attempts and dwindling time I opted for a miniature version instead.
In cake-debrief conversations with Ma (aka the real brains behind this blog) a plan was hatched for a cake with a firm enough structure to support a large spherical shape so watch this space for a large, extra grisly version of these snack-sized eyeballs hopefully coming up soon.
Now, back to said snacks. They’re no bake (winner) and a deliciously gooey combination of caramelly dates, rich cacao and moreish almond butter. I couldn’t create such a horrifying-looking treat without a little surprise, so as you bite into them they’ve got a pop of raspberry jam in the middle. Deliciously terrifying.
Add a slick of ready to roll white icing around the outside, a miniature iris and pupil and the occasional red painted blood vessel and you’ve got yourself a frightful looking party snack. The painting element of this is very fun indeed and doesn’t require a particularly artistic skillset (I can vouch for that).
If you’ve never indulged in ‘cake decorating’ before I can tell you it’s much simpler that you might think – this was actually my first ever attempt at icing anything…. and I don’t think I did too bad? Ready to roll icing is also widely available in supermarkets and my local is labelled as vegan.
Now I’ve run out of synonyms for the word ‘gruesome’ so lets get into the recipe. Mwahhahahahah!
These grisly little beauties are the perfect party snack and will go down a storm at Halloween! They’re:
Sweet and chocolatey
Gooey and satisfyingly squishy
With a pop of tangy raspberry jam in the middle
And a rather horrifying look that’s easy to re-create and too fun to resist
I have no doubt that you will LOVE this recipe – be sure to tag me on Instagram when you make it @aveganvisit 🙂
The Video Recipe:
The Written Recipe:
Gooey Chocolate Eyeballs with a Raspberry Jam Centre (No Bake)
Ingredients
For the balls:
- 300 g medjool dates (*see note)
- 200 g almond butter
- 50 g cacao powder (substitute: cocoa powder)
- 40 g coconut nectar (substitute: maple syrup)
- 25 g coconut oil (melted)
- 100 g oat flour
- ½ tsp salt
- 1 dash water (to blend)
For the centre:
- 100 g raspberry jam
For the decoration (the fun bit!):**
- 500 g ready to roll white icing
- 50 g ready to roll blue icing
- 20 g ready to roll black icing
- Edible glue
- Edible paint – white and red
- Edible ink pens – dark blue and glitter blue (felt tip style)
Instructions
To make the balls:
- Blitz all of the ball ingredients in a food processor with a dash of water until smooth and fully combined. Use small dashes of water to keep the mix moving but you shouldn’t need too much. You want the consistency to be dry enough to roll into balls without it sticking to your hands.300 g medjool dates, 200 g almond butter, 50 g cacao powder, 40 g coconut nectar, 25 g coconut oil, 100 g oat flour, 1/2 tsp salt, 1 dash water
- Take a small amount of the mixture, roll it into a ball and then press your little finger into it to form a bowl shape.
- Add a small amount of jam to the centre of the 'bowl' and then take another bit of the ball mix, flatten it out and place it over the top of the 'bowl' to encase the jam. Roll the mix gently in your palm to make a spherical shape. (Please see the recipe video for a demonstration).100 g raspberry jam
- Once you’ve made your balls, place them in the freezer for at least an hour to harden up. You won’t need to keep them frozen, this just makes them easier to decorate and keeps them in a spherical shape whilst you ice them.
To decorate your eyeballs:
- Whilst your balls are in the freezer, make your irises. Dust a smooth surface with a little icing sugar and roll out your blue icing to around 1/8-1/4cm (1/8") thick. Cut out small circles.50 g ready to roll blue icing
- Repeat this process for the pupils using the black icing and cutting out smaller circles. I used two different sizes of metal straw and it worked perfectly. You could also use the two ends of a metal piping nozzle. (Please see the recipe video for a demonstration).20 g ready to roll black icing
- Glue the pupil to the centre of the iris with your edible glue and set it aside to dry.
- Dust your surface with a little more icing sugar if needed and then roll out your white icing to around 1/4cm (1/8") thick.500 g ready to roll white icing
- Take 5 of your balls out of the freezer at a time, leaving the rest in the freezer. Cut out a white circle of icing large enough to cover your eyeballs. If you’ve cut it a little small you can roll out the circle a bit more with your rolling pin to expand it, it doesn’t need to be a perfect circle.
- Wrap the white icing around the ball, patching any gaps with additional icing. Roll the ball between your hands until it is smooth and then pop it in a petit four case. At this point you can set it aside at room temperature, you were only keeping it frozen to aid the covering process.
- You may notice that the icing goes glossy as the balls defrost but don’t worry about this, I found it actually aids the painting process and they will dry out again within an hour or so.
- Once you’ve covered your five balls with white icing, glue the iris to the eyeball using edible glue.
- Decorate the iris with your blue pens and then add a dot of white paint to the top corner of the pupil. Paint red veins on the white of the eye if desired. Go easy on the thickness of the paint as it can take a while to dry out – make it as thin as possible.
- Repeat with the rest of your eye balls, 5 at a time. Leave over night at room temperature to dry out.

